OpenCV provides a convenient way to detect blobs and filter them based on a variety of characteristics. There are many different parameters that control the identification process and the results. Important parameters used in this project are:
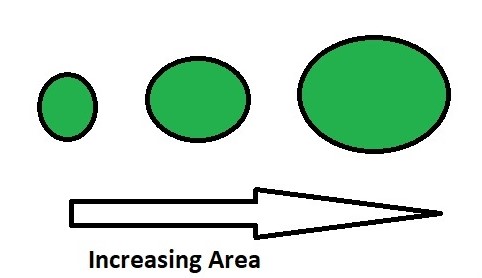
Filter by area - this is to avoid identifying any small dots present in the image that may be mistakenly detected as a circle.

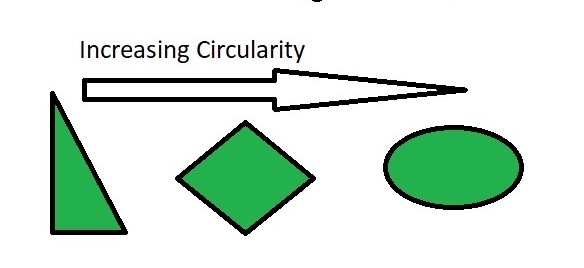
Filter by Circularity – This helps us to identify, shapes that are more similar to a circle. A true circle has circularity of 1, a square has a circularity near 78%.
Filter by Convexity – Concavity in general, destroys the circularity.More is the convexity, the closer it is to a close circle.

Filter by Inertia – Objecs similar to a circle has larger inertial.E.g. for a circle, this value is 1, for an ellipse it is between 0 and 1, and for a line it is 0. To filter by inertia ratio, set filterByInertia = 1, and set, 0 <= minInertiaRatio <= 1 and maxInertiaRatio (<=1 ) appropriately.
Below is the code for identifying Circles:
import cv2
import numpy as np

# Load image
image = cv2.imread(’C://gfg//images//blobs.jpg’, 0)

# Set our filtering parameters
# Initialize parameter settiing using cv2.SimpleBlobDetector
params = cv2.SimpleBlobDetector_Params()

# Set Area filtering parameters
params.filterByArea = True
params.minArea = 100

# Set Circularity filtering parameters
params.filterByCircularity = True
params.minCircularity = 0.9

# Set Convexity filtering parameters
params.filterByConvexity = True
params.minConvexity = 0.2

# Set inertia filtering parameters
params.filterByInertia = True
params.minInertiaRatio = 0.01

# Create a detector with the parameters
detector = cv2.SimpleBlobDetector_create(params)

# Detect blobs
keypoints = detector.detect(image)

# Draw blobs on our image as red circles
blank = np.zeros((1, 1))
blobs = cv2.drawKeypoints(image, keypoints, blank, (0, 0, 255),
						cv2.DRAW_MATCHES_FLAGS_DRAW_RICH_KEYPOINTS)

number_of_blobs = len(keypoints)
text = "Number of Circular Blobs: " + str(len(keypoints))
cv2.putText(blobs, text, (20, 550),
			cv2.FONT_HERSHEY_SIMPLEX, 1, (0, 100, 255), 2)

# Show blobs
cv2.imshow("Filtering Circular Blobs Only", blobs)
cv2.waitKey(0)
cv2.destroyAllWindows()
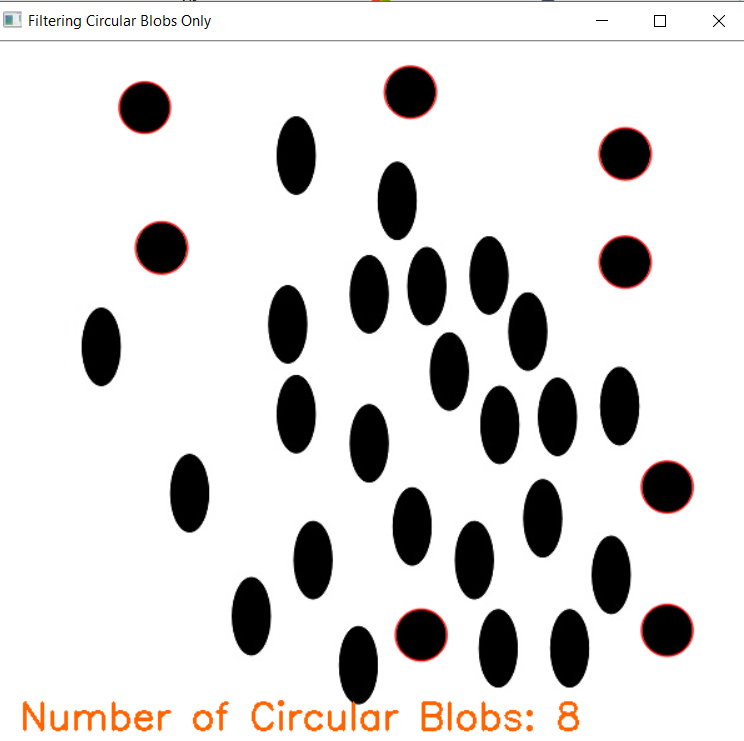
Output:

The cv2.HoughCircles Function
To detect circles in images, you will need to use the cv2.HoughCircles function. It’s definitely not the easiest feature to use, but with a little explanation I think you’ll understand.
- image: 8 bit, single channel image. If you are working with a color image, convert to grayscale first.
- method: defines the method for detecting circles in images. Currently, the only implemented method is cv2.HOUGH_GRADIENT, which corresponds to Yuen et al. paper.
- dp: this parameter is the inverse relationship between the resolution of the accumulator and the resolution of the image (see Yuen et al. for details). Basically, the higher the dp, the smaller the accumulator array.
- minDist: Minimum distance between the central coordinates (x, y) of the detected circles. If minDist is too small, it is possible to (falsely) detect several circles in the same vicinity as the original. If minDist is too large, some circles may not be detected at all.
- param1: gradient value used to manage edge detection in Yuen et al. method.
- param2: Accumulator threshold value for the cv2.HOUGH_GRADIENT method. The smaller the threshold, the more circles will be detected (including false circles). The higher the threshold, the greater the number of circles potentially returned.
- minRadius: minimum size of the ray (in pixels).
- maxRadius: maximum dimension of the ray (in pixels).
But I’ll say this: get ready to play with parameter values from one image to another. The minDist parameter is particularly important to be correct. Without an optimal minDist value, you may miss some circles or find many false circles.
Detecting Circles in Images using OpenCV
# import the necessary packages
import numpy as np
import argparse
import cv2
# construct the argument parser and parse the arguments
ap = argparse.ArgumentParser()
ap.add_argument("-i", "--image", required = True, help = "Path to the image")
args = vars(ap.parse_args())
Lines 2-4 import the necessary packages we will need. We will be using NumPy for numerical processing, argparse for parsing command line arguments, and cv2 for our OpenCV links. So, on lines 7-9 we parse our command line arguments. We will need only one switch, --image, which is the path of the image where we want to detect the circles.
Detect ellipses, ovals in images with OpenCV Python
Hi everyone, I’m using opencv to detect shapes that look like circles, my script reads a png image (center_cut.png) and perfectly detects the circles with their centroids, but when I go through another image where the circles are no longer perfect, not recognize them (left_cut). I would like to know if there is any way to detect shapes similar to circles, could someone guide me? My code is as follows:
import cv2
import numpy as np

img = cv2.imread(’center_cut.png’,0)
img = cv2.medianBlur(img,5)
cimg = cv2.cvtColor(img,cv2.COLOR_GRAY2BGR)

circles = cv2.HoughCircles(img,cv2.HOUGH_GRADIENT,1, 50,
                             param1=80,param2=20,minRadius=3,maxRadius=25)


circles = np.uint16(np.around(circles))
for i in circles[0,:]:
    # Dibuja la circusnferencia del círculo
    cv2.circle(cimg,(i[0],i[1]),i[2],(0,255,0),2)
    # dibuja el centro del círculo
    cv2.circle(cimg,(i[0],i[1]),2,(0,0,255),3)

cv2.imshow(’círculos detectados’,cimg)
cv2.waitKey(0)
cv2.destroyAllWindows()
Answer:
Well, if these are representative images, you’d probably better do something other than HoughCircles. I suggest doing an adaptive boundary to segment the image into black and white, inverting the image and then running the connected components. If you use connectedComponentWithStats, it will return the centroid of each component (which would be the circles)
If you’re concerned about edges, you’ll have to remove any component that touches the edges of the image, but that shouldn’t be difficult.
t2 = cv2.imread(’Test2.png’)
thresh = cv2.cvtColor(t2, cv2.COLOR_BGR2GRAY)
thresh = cv2.adaptiveThreshold(thresh, 255, cv2.ADAPTIVE_THRESH_MEAN_C, cv2.THRESH_BINARY_INV, 101, 0)
count, labels, stats, centroids = cv2.connectedComponentsWithStats(thresh)
for i in range(1,count):
    t2 = cv2.circle(t2, (int(centroids[i,0]), int(centroids[i,1])), 5, (0, 255, 0, 0), 5)

cv2.imshow(’circles’, thresh)
cv2.imshow(’centers’, t2)
cv2.waitKey()
Ellipse detection in OpenCV Python
StackOverflow question

i’m looking for a better solution or algorithm to detect the ellipse part (dish) in this photo and mask it in an other photo in Opencv. could you please give me some advice or solution. and my code is :
 circles = cv2.HoughCircles(img, cv2.HOUGH_GRADIENT, 1.2, 1, param1=128, minRadius=200, maxRadius=600)
    # draw detected circles on image
    circles = circles.tolist()
    for cir in circles:
        for x, y, r in cir:
            x, y, r = int(x), int(y), int(r)
            cv2.circle(img, (x, y), r, (0, 255, 0), 4)

    # show the output image
    cv2.imshow("output", cv2.resize(img, (500, 500)))
Answer:
There is an alternative for it in skimage made by Xie, Yonghong, and Qiang Ji and published as...
“A new efficient ellipse detection method.” Pattern Recognition, 2002. Proceedings. 16th International Conference on. Vol. 2. IEEE, 2002.
Their Ellipse detection code is relatively slow and the example takes about 70 seconds; compared to website claimed "28 seconds".
If you have conda or pip: "name" install scikit-image and give it a shot...
Their code can be found here or as copy/pasted below:
import matplotlib.pyplot as plt

from skimage import data, color, img_as_ubyte
from skimage.feature import canny
from skimage.transform import hough_ellipse
from skimage.draw import ellipse_perimeter

# Load picture, convert to grayscale and detect edges
image_rgb = data.coffee()[0:220, 160:420]
image_gray = color.rgb2gray(image_rgb)
edges = canny(image_gray, sigma=2.0,
              low_threshold=0.55, high_threshold=0.8)

# Perform a Hough Transform
# The accuracy corresponds to the bin size of a major axis.
# The value is chosen in order to get a single high accumulator.
# The threshold eliminates low accumulators
result = hough_ellipse(edges, accuracy=20, threshold=250,
                       min_size=100, max_size=120)
result.sort(order=’accumulator’)

# Estimated parameters for the ellipse
best = list(result[-1])
yc, xc, a, b = [int(round(x)) for x in best[1:5]]
orientation = best[5]

# Draw the ellipse on the original image
cy, cx = ellipse_perimeter(yc, xc, a, b, orientation)
image_rgb[cy, cx] = (0, 0, 255)
# Draw the edge (white) and the resulting ellipse (red)
edges = color.gray2rgb(img_as_ubyte(edges))
edges[cy, cx] = (250, 0, 0)

fig2, (ax1, ax2) = plt.subplots(ncols=2, nrows=1, figsize=(8, 4), sharex=True,
                                sharey=True,
                                subplot_kw={’adjustable’:’box’})

ax1.set_title(’Original picture’)
ax1.imshow(image_rgb)

ax2.set_title(’Edge (white) and result (red)’)
ax2.imshow(edges)

plt.show()
Multi-ellipses detection on images inspired by collective animal behavior
The approach employs an evolutionary algorithm to mimic the way animals behave collectively assuming the overall detection process as a multi-modal optimization problem. In the algorithm, searcher agents emulate a group of animals that interact to each other using simple biological rules which are modeled as evolutionary operators. In turn, such operators are applied to each agent considering that the complete group has a memory to store optimal solutions (ellipses) seen so-far by applying a competition principle. The detector uses a combination of five edge points as parameters to determine ellipse candidates (possible solutions) while a matching function determines if such ellipse candidates are actually present in the image.
Guided by the values of such matching functions, the set of encoded candidate ellipses are evolved through the evolutionary algorithm so that the best candidates can be fitted into the actual ellipses within the image. Just after the optimization process ends, an analysis over the embedded memory is executed in order to find the best obtained solution (the best ellipse) and significant local minima (remaining ellipses). Experimental results over several complex synthetic and natural images have validated the efficiency of the proposed technique regarding accuracy, speed and robustness.
Read the full article
