
OpenCV Python is a Python link library designed to solve computer vision problems. The cv2.putText () method is used to draw a text string on any image.
cv2 puttext
| void cv::putText | ( | InputOutputArray | img, |
| const String & | text, | ||
| Point | org, | ||
| int | fontFace, | ||
| double | fontScale, | ||
| Scalar | color, | ||
| int | thickness = 1, |
||
| int | lineType = LINE_8, |
||
| bool | bottomLeftOrigin = false |
||
| ) |
Syntax: cv2.putText(image, text, org, font, fontScale, color[, thickness[, lineType[, bottomLeftOrigin]]])
Parameters:
image: It is the image on which text is to be drawn.text: Text string to be drawn.
org: It is the coordinates of the bottom-left corner of the text string in the image. The coordinates are represented as tuples of two values i.e. (X coordinate value, Y coordinate value).
font: It denotes the font type. Some of font types are FONT_HERSHEY_SIMPLEX, FONT_HERSHEY_PLAIN, , etc.
fontScale: Font scale factor that is multiplied by the font-specific base size.
color: It is the color of text string to be drawn. For BGR, we pass a tuple. eg: (255, 0, 0) for blue color.
thickness: It is the thickness of the line in px.
lineType: This is an optional parameter.It gives the type of the line to be used.
bottomLeftOrigin: This is an optional parameter. When it is true, the image data origin is at the bottom-left corner. Otherwise, it is at the top-left corner.
Return Value: It returns an image.
How to write text on a image in windows using Python OpenCV2?
StackOverflow question
I want to put some text on an Image.
I am writing the code as:
cv2.putText(image,"Hello World!!!", (x,y), cv2.CV_FONT_HERSHEY_SIMPLEX, 2, 255)
It gives ERROR, saying ’module’ object has no attribute ’CV_FONT_HERSHEY_SIMPLEX’
Query
Can’t I use the font type as above? I searched in internet, but found only the syntax related to to Opencv C++ for initFont.
Then I thought of using putText to pass the font type as parameter.
But it is not working for me.
Any suggestions?
Answer:
This code uses cv2.putText to overlay text on an image. You need NumPy and OpenCV installed.
import numpy as np
import cv2

# Create a black image
img = np.zeros((512,512,3), np.uint8)

# Write some Text

font                   = cv2.FONT_HERSHEY_SIMPLEX
bottomLeftCornerOfText = (10,500)
fontScale              = 1
fontColor              = (255,255,255)
lineType               = 2

cv2.putText(img,’Hello World!’,
    bottomLeftCornerOfText,
    font,
    fontScale,
    fontColor,
    lineType)

#Display the image
cv2.imshow("img",img)

#Save image
cv2.imwrite("out.jpg", img)

cv2.waitKey(0)
Write Text at the center of the image using Python cv2.puttext
If you know the shape (width, height) of the text you write on the image, you can put it in the center aligned on the image.
The approximate shape of the text in the example above is (268, 36). You may need to find the shape of a specific text using Paint or some other application.
import numpy as np
import cv2

image = cv2.imread(’sample.png’,cv2.IMREAD_UNCHANGED)

position = ((int) (image.shape[1]/2 - 268/2), (int) (image.shape[0]/2 - 36/2))

cv2.putText(
     image, #numpy array on which text is written
     "Python Examples", #text
     position, #position at which writing has to start
     cv2.FONT_HERSHEY_SIMPLEX, #font family
     1, #font size
     (209, 80, 0, 255), #font color
     3) #font stroke
cv2.imwrite(’output.png’, image)
Output image:
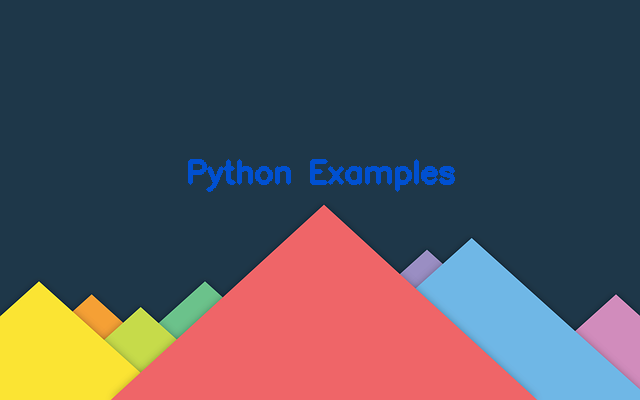
Python OpenCV puttext
cv2 puttext Example #1
def detect(imgfile):
    origimg = cv2.imread(imgfile)
    img = preprocess(origimg)

    img = img.astype(np.float32)
    img = img.transpose((2, 0, 1))

    net.blobs[’data’].data[...] = img
    out = net.forward()
    box, conf, cls = postprocess(origimg, out)

    for i in range(len(box)):
       p1 = (box[i][0], box[i][1])
       p2 = (box[i][2], box[i][3])
       cv2.rectangle(origimg, p1, p2, (0,255,0))
       p3 = (max(p1[0], 15), max(p1[1], 15))
       title = "%s:%.2f" % (COCO_CLASSES[int(cls[i])], conf[i])
       cv2.putText(origimg, title, p3, cv2.FONT_ITALIC, 0.6, (0, 255, 0), 1)
    cv2.imshow("SSD", origimg)

    k = cv2.waitKey(0) & 0xff
        #Exit if ESC pressed
    if k == 27 : return False
    return True
cv2.puttext Example #2
def drawBoundingBox(self,imgcv,result):
        for box in result:
            # print(box)
            x1,y1,x2,y2 = (box[’topleft’][’x’],box[’topleft’][’y’],box[’bottomright’][’x’],box[’bottomright’][’y’])
            conf = box[’confidence’]
            # print(conf)
            label = box[’label’]
            if conf < self.predictThresh:
                continue
            # print(x1,y1,x2,y2,conf,label)
            cv2.rectangle(imgcv,(x1,y1),(x2,y2),(0,255,0),6)
            labelSize=cv2.getTextSize(label,cv2.FONT_HERSHEY_COMPLEX,0.5,2)
            # print(’labelSize>>’,labelSize)
            _x1 = x1
            _y1 = y1#+int(labelSize[0][1]/2)
            _x2 = _x1+labelSize[0][0]
            _y2 = y1-int(labelSize[0][1])
            cv2.rectangle(imgcv,(_x1,_y1),(_x2,_y2),(0,255,0),cv2.FILLED)
            cv2.putText(imgcv,label,(x1,y1),cv2.FONT_HERSHEY_COMPLEX,0.5,(0,0,0),1)
        return imgcv
cv2 puttext Example #3
def draw_labels(x, y, class_names=None):
    img = x.numpy()
    if img.ndim == 2 or img.shape[2] == 1:
        img = cv2.cvtColor(img, cv2.COLOR_GRAY2BGR)
    boxes, classes = tf.split(y, (4, 1), axis=-1)
    classes = classes[..., 0]
    wh = np.flip(img.shape[0:2])
    min_wh = np.amin(wh)
    if min_wh <= 100:
        font_size = 0.5
    else:
        font_size = 1
    for i in range(len(boxes)):
        x1y1 = tuple((np.array(boxes[i][0:2]) * wh).astype(np.int32))
        x2y2 = tuple((np.array(boxes[i][2:4]) * wh).astype(np.int32))
        img = cv2.rectangle(img, x1y1, x2y2, (255, 0, 0), 1)
        if class_names:
            img = cv2.putText(img, class_names[classes[i]], x1y1, cv2.FONT_HERSHEY_COMPLEX_SMALL, font_size,
                              (0, 0, 255), 1)
        else:
            img = cv2.putText(img, str(classes[i]), x1y1, cv2.FONT_HERSHEY_COMPLEX_SMALL, 1, (0, 0, 255), 1)
    return img
cv2.puttext Example #4
def draw_outputs(img, outputs, class_names=None):
    boxes, objectness, classes = outputs
    #boxes, objectness, classes = boxes[0], objectness[0], classes[0]
    wh = np.flip(img.shape[0:2])
    if img.ndim == 2 or img.shape[2] == 1:
        img = cv2.cvtColor(img, cv2.COLOR_GRAY2BGR)
    min_wh = np.amin(wh)
    if min_wh <= 100:
        font_size = 0.5
    else:
        font_size = 1
    for i in range(classes.shape[0]):
        x1y1 = tuple((np.array(boxes[i][0:2]) * wh).astype(np.int32))
        x2y2 = tuple((np.array(boxes[i][2:4]) * wh).astype(np.int32))
        img = cv2.rectangle(img, x1y1, x2y2, (255, 0, 0), 1)
        img = cv2.putText(img, ’{}’.format(int(classes[i])), x1y1, cv2.FONT_HERSHEY_COMPLEX_SMALL, font_size,
                          (0, 0, 255), 1)
    return img
cv2 puttext Example #5
def detect(imgfile):
    origimg = cv2.imread(imgfile)
    img = preprocess(origimg)

    img = img.astype(np.float32)
    img = img.transpose((2, 0, 1))

    net.blobs[’data’].data[...] = img
    out = net.forward()
    box, conf, cls = postprocess(origimg, out)

    for i in range(len(box)):
       p1 = (box[i][0], box[i][1])
       p2 = (box[i][2], box[i][3])
       cv2.rectangle(origimg, p1, p2, (0,255,0))
       p3 = (max(p1[0], 15), max(p1[1], 15))
       title = "%s:%.2f" % (CLASSES[int(cls[i])], conf[i])
       cv2.putText(origimg, title, p3, cv2.FONT_ITALIC, 0.6, (0, 255, 0), 1)
    cv2.imshow("SSD", origimg)

    k = cv2.waitKey(0) & 0xff
        #Exit if ESC pressed
    if k == 27 : return False
    return True
cv2.puttext Example #6
def draw_boxes_frame(frame, frame_size, boxes_dicts, class_names, input_size):
  """Draws detected boxes in a video frame"""
  boxes_dict = boxes_dicts[0]
  resize_factor = (frame_size[0] / input_size[1], frame_size[1] / input_size[0])
  for cls in range(len(class_names)):
    boxes = boxes_dict[cls]
    color = (0, 0, 255)
    if np.size(boxes) != 0:
      for box in boxes:
        xy = box[:4]
        xy = [int(xy[i] * resize_factor[i % 2]) for i in range(4)]
        cv2.rectangle(frame, (xy[0], xy[1]), (xy[2], xy[3]), color[::-1], 2)
        (test_width, text_height), baseline = cv2.getTextSize(class_names[cls],
                                                              cv2.FONT_HERSHEY_SIMPLEX,
                                                              0.75, 1)
        cv2.rectangle(frame,
                      (xy[0], xy[1]),
                      (xy[0] + test_width, xy[1] - text_height - baseline),
                      color[::-1],
                      thickness=cv2.FILLED)
        cv2.putText(frame, class_names[cls], (xy[0], xy[1] - baseline), cv2.FONT_HERSHEY_SIMPLEX, 0.75, (0, 0, 0), 1)
cv2 puttext Example #7
def ProcessFrame(self, frame):
        # segment arm region
        segment = self.SegmentArm(frame)

        # make a copy of the segmented image to draw on
        draw = cv2.cvtColor(segment, cv2.COLOR_GRAY2RGB)

        # draw some helpers for correctly placing hand
        cv2.circle(draw,(self.imgWidth/2,self.imgHeight/2),3,[255,102,0],2)
        cv2.rectangle(draw, (self.imgWidth/3,self.imgHeight/3), (self.imgWidth*2/3, self.imgHeight*2/3), [255,102,0],2)

        # find the hull of the segmented area, and based on that find the
        # convexity defects
        [contours,defects] = self.FindHullDefects(segment)

        # detect the number of fingers depending on the contours and convexity defects
        # draw defects that belong to fingers green, others red
        [nofingers,draw] = self.DetectNumberFingers(contours, defects, draw)

        # print number of fingers on image
        cv2.putText(draw, str(nofingers), (30,30), cv2.FONT_HERSHEY_SIMPLEX, 1, (255,255,255))
        return draw
cv2.puttext Example #8
def vis_class(img, pos, class_str, bg_color):
    """Visualizes the class."""
    font_color = cfg.VIS.SHOW_CLASS.COLOR
    font_scale = cfg.VIS.SHOW_CLASS.FONT_SCALE

    x0, y0 = int(pos[0]), int(pos[1])
    # Compute text size.
    txt = class_str
    font = cv2.FONT_HERSHEY_SIMPLEX
    ((txt_w, txt_h), _) = cv2.getTextSize(txt, font, font_scale, 1)
    # Place text background.
    back_tl = x0, y0 - int(1.3 * txt_h)
    back_br = x0 + txt_w, y0
    cv2.rectangle(img, back_tl, back_br, bg_color, -1)
    # Show text.
    txt_tl = x0, y0 - int(0.3 * txt_h)
    cv2.putText(img, txt, txt_tl, font, font_scale, font_color, lineType=cv2.LINE_AA)

    return img
cv2 puttext Example #9
def plot_one_box(x, img, color=None, label=None, line_thickness=None):
    # Plots one bounding box on image img
    tl = line_thickness or round(0.002 * (img.shape[0] + img.shape[1]) / 2) + 1  # line thickness
    color = color or [random.randint(0, 255) for _ in range(3)]
    c1, c2 = (int(x[0]), int(x[1])), (int(x[2]), int(x[3]))
    cv2.rectangle(img, c1, c2, color, thickness=tl)
    if label:
        tf = max(tl - 1, 1)  # font thickness
        t_size = cv2.getTextSize(label, 0, fontScale=tl / 3, thickness=tf)[0]
        c2 = c1[0] + t_size[0], c1[1] - t_size[1] - 3
        cv2.rectangle(img, c1, c2, color, -1)  # filled
        cv2.putText(img, label, (c1[0], c1[1] - 2), 0, tl / 3, [225, 255, 255], thickness=tf, lineType=cv2.LINE_AA)
cv2.puttext Example #10
def vis_det_and_mask(im, class_name, dets, masks, thresh=0.8):
    """Visual debugging of detections."""
    num_dets = np.minimum(10, dets.shape[0])
    colors_mask = random_colors(num_dets)
    colors_bbox = np.round(np.random.rand(num_dets, 3) * 255)
    # sort rois according to the coordinates, draw upper bbox first
    draw_mask = np.zeros(im.shape[:2], dtype=np.uint8)

    for i in range(1):
        bbox = tuple(int(np.round(x)) for x in dets[i, :4])
        mask = masks[i, :, :]
        full_mask = unmold_mask(mask, bbox, im.shape)

        score = dets[i, -1]
        if score > thresh:
            word_width = len(class_name)
            cv2.rectangle(im, bbox[0:2], bbox[2:4], colors_bbox[i], 2)
            cv2.rectangle(im, bbox[0:2], (bbox[0] + 18 + word_width*8, bbox[1]+15), colors_bbox[i], thickness=cv2.FILLED)
            apply_mask(im, full_mask, draw_mask, colors_mask[i], 0.5)
            draw_mask += full_mask
            cv2.putText(im, ’%s’ % (class_name), (bbox[0]+5, bbox[1] + 12), cv2.FONT_HERSHEY_PLAIN,
								1.0, (255,255,255), thickness=1)
    return im

Displaying text over an image in OpenCV puttext
To overlay text on a frame, use the function:
- putText( frame, text, coordinates,
- font type, font scale,
- color [, pen thickness [, linetype [, origin]]])
- frame - the image on which we impose the text;
- text - of course, the text that we are going to display in the frame;
- coordinates - a tuple of two coordinates of the lower left corner of the text, for example (5,10);
- font type - one of the constants listed below;
- font scale - the font has a certain standard size, which is quite large. This option allows you to reduce or increase the font relative to the standard. For example, to increase by two times - we write 2, to decrease by 2 times - 0.5;
- color - a tuple of three numbers from 0 to 255 that define the color in the RGB model. You need to remember that in this tuple, the colors go back to front: BGR. Blue color - (255,0,0);
- pen thickness is an optional parameter;
- line type — optional parameter, one of three values: LINE_8 small dotted line, LINE_4 large dotted line, LINE_AA smoothed line;
- coordinate center is an optional parameter. By default, text coordinates are measured from the top left corner. If this parameter is True, then they will be from the bottom left corner.
mport cv2
import video

if __name__ == ’__main__’:
    cv2.namedWindow( "result" )

cap = video.create_capture(0)

color_yellow = (0,255,255)

while True:
    flag, img = cap.read()
    try:
        cv2.putText(img, "Hello world!", (20,20), cv2.FONT_HERSHEY_SIMPLEX, 1, color_yellow, 2)
        cv2.imshow(’result’, img)
    except:
        cap.release()
        raise

    ch = cv2.waitKey(5)
    if ch == 27:
        break

cap.release()
cv2.destroyAllWindows()
Python OpenCV | cv2.putText () method __del__: Questions
How can I make a time delay in Python?
5 answers
I would like to know how to put a time delay in a Python script.
Answer #1
import time
time.sleep(5)   # Delays for 5 seconds. You can also use a float value.
Here is another example where something is run approximately once a minute:
import time
while True:
    print("This prints once a minute.")
    time.sleep(60) # Delay for 1 minute (60 seconds).
Answer #2
You can use the sleep() function in the time module. It can take a float argument for sub-second resolution.
from time import sleep
sleep(0.1) # Time in seconds
Python OpenCV | cv2.putText () method __del__: Questions
How to delete a file or folder in Python?
5 answers
How do I delete a file or folder in Python?
Answer #1
os.remove()removes a file.os.rmdir()removes an empty directory.shutil.rmtree()deletes a directory and all its contents.
Path objects from the Python 3.4+ pathlib module also expose these instance methods:
pathlib.Path.unlink()removes a file or symbolic link.pathlib.Path.rmdir()removes an empty directory.